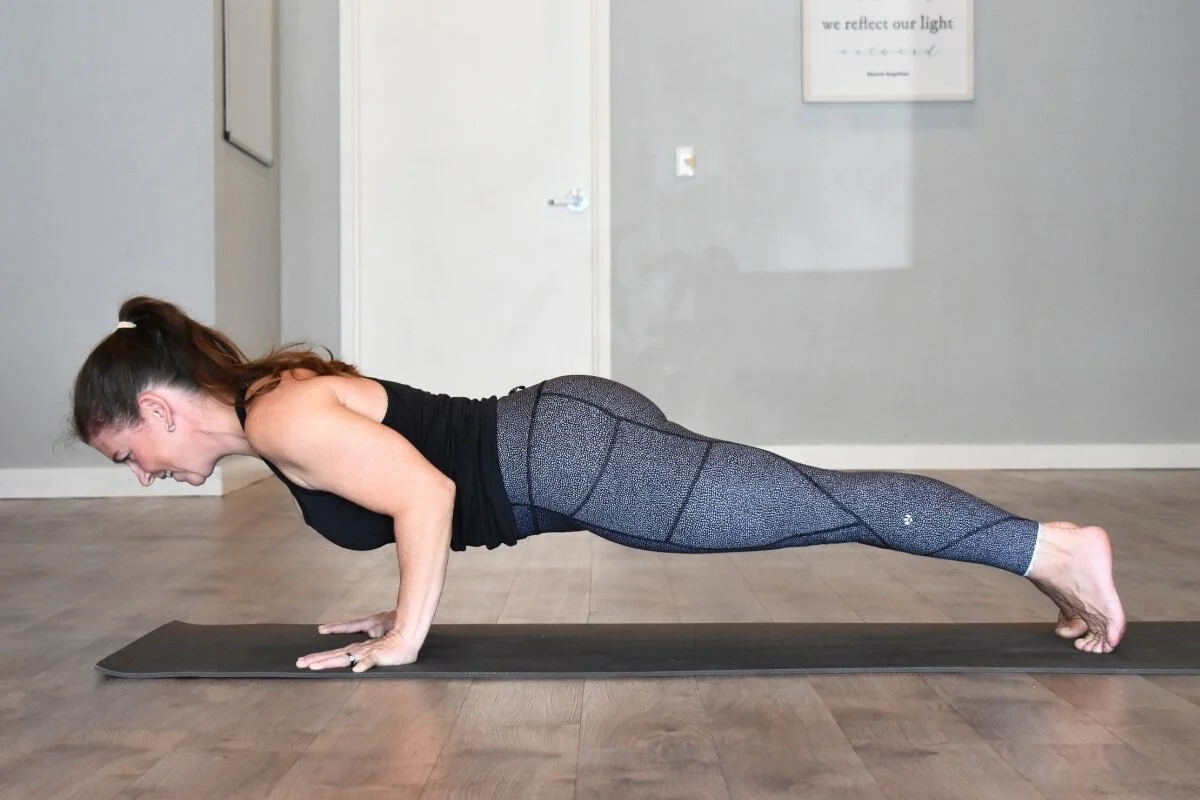
Elbows By Your Sides in Chaturanga?
Early in my yoga practice, I heard a cue that stopped me mid-posture. "Squeeze your elbows by your sides." I was already a physical therapist by then, and my brain went straight to the anatomy. Squeeze them how far? Is that what this posture is actually supposed to look like?
I watched other students in the room try it too. Some tucked their elbows so far in they ended up under their ribcage. Shoulders rounded forward. The posture looked harder and less stable, not more. It's not natural to question cues we learn from teachers we trust. But when we don't question them, we can start defining our students' bodies by what we perceive rather than what's actually there.
That's what this blog is about.
The cue "elbows by your sides" in chaturanga has nothing to do with the elbows. It's about the shoulder joint. And once you understand that, you'll know exactly when to use it and when to leave it alone.
In This Article:
Why we say "elbows by your sides" in chaturanga
The anatomy of the elbow joint (and why it's not the real story)
What actually controls elbow position in chaturanga
When this cue works and when to skip it
A more empowering approach to cueing chaturanga
Why Do We Cue "Elbows By Your Sides" in Chaturanga?
Cues get passed down in yoga the way recipes get passed down in families. Someone learned it, it seemed to work, they taught it, and it spread. The problem is that along the way, the why often gets lost. And when we don't know the why, we can't tell when a cue is helping and when it isn't.
"Elbows by your sides" shows up in so many vinyasa classes. It seems like some teachers say it every single chaturanga, regardless of what they're actually seeing in the room. Students, trying their best to follow the instruction, sometimes take it further than intended.
So let's go back to the anatomy and find the why.
The Anatomy of the Elbow Joint
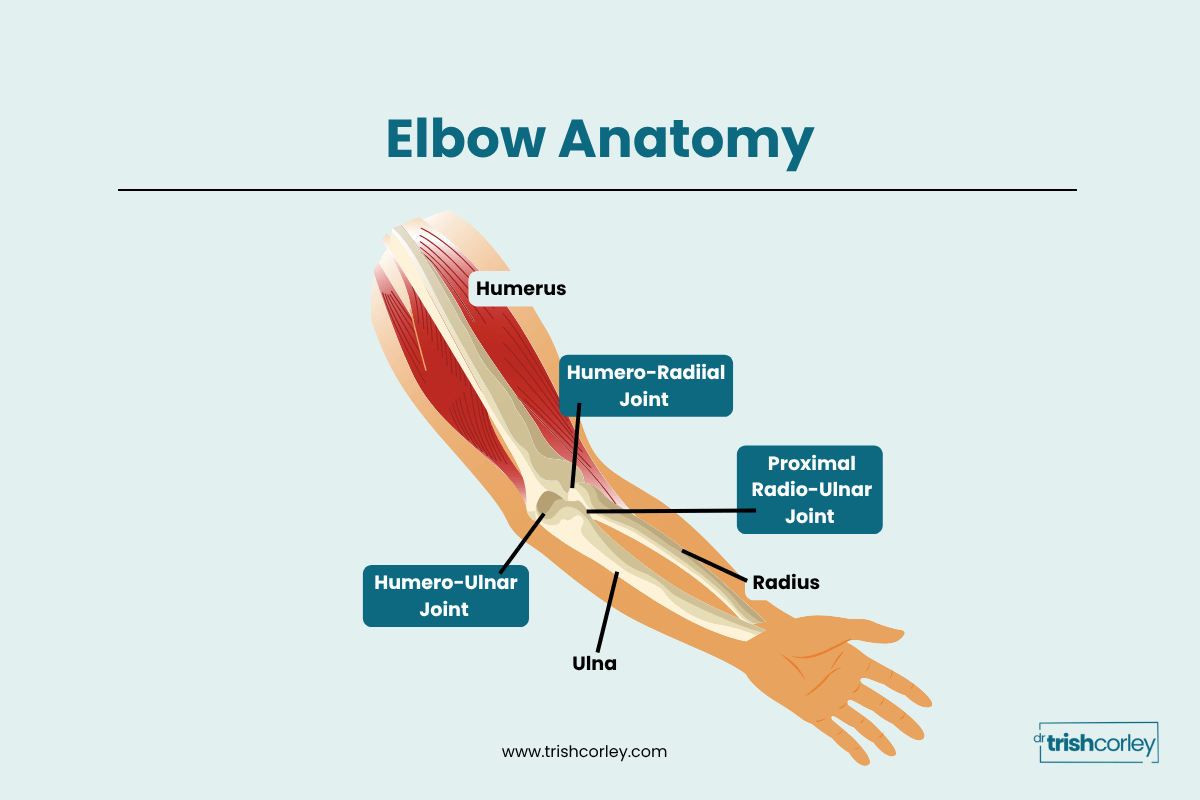
The elbow joint is made up of three parts:
Humero-ulnar joint: the articulation between your upper arm bone (humerus) and the long bone on the pinkie side of your forearm (ulna). This is a true hinge joint. It bends and straightens. That's it.
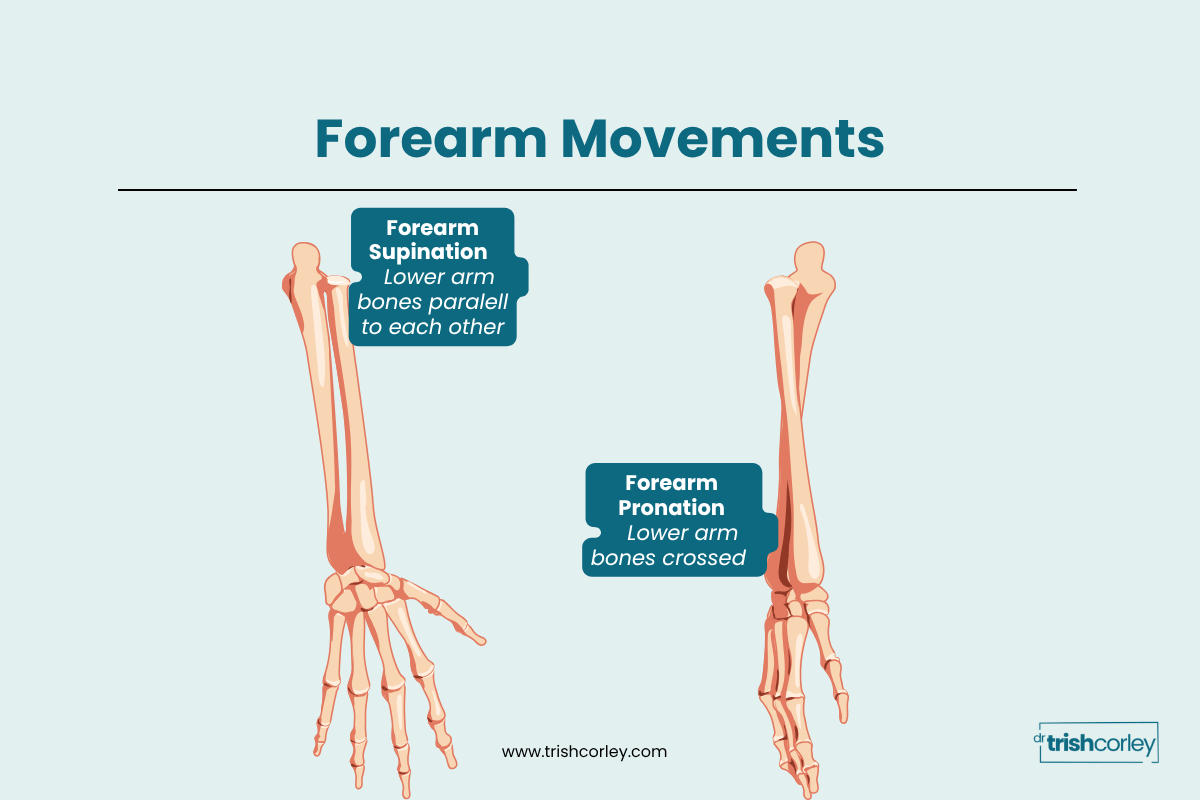
Humero-radial joint: the articulation between your humerus and the bone on the thumb side of your forearm (radius). This is a pivot joint, responsible for the rotational movements of pronation (palm down) and supination (palm up).
Proximal radio-ulnar joint: where the radius and ulna connect to each other. Pronation and supination also occur here.
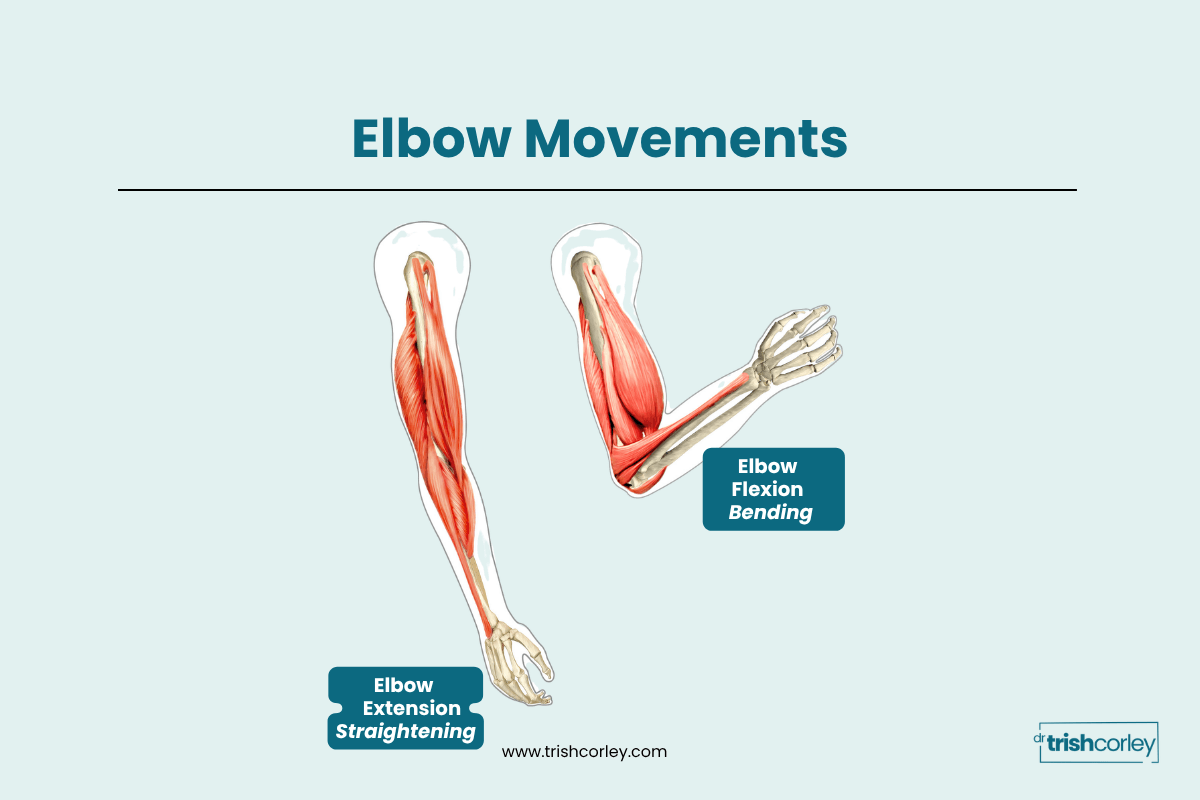
Here's the key detail: because the humero-ulnar joint is a true hinge, it can only bend and straighten. It cannot move your elbow toward or away from your body. That movement has to come from somewhere else.
What Actually Controls Elbow Position in Chaturanga
The movement that brings your elbows toward or away from your body comes from your humerus, your upper arm bone. And the humerus is a key part of the shoulder joint.
So elbow position in chaturanga is really shoulder joint position.
Here's how it breaks down:
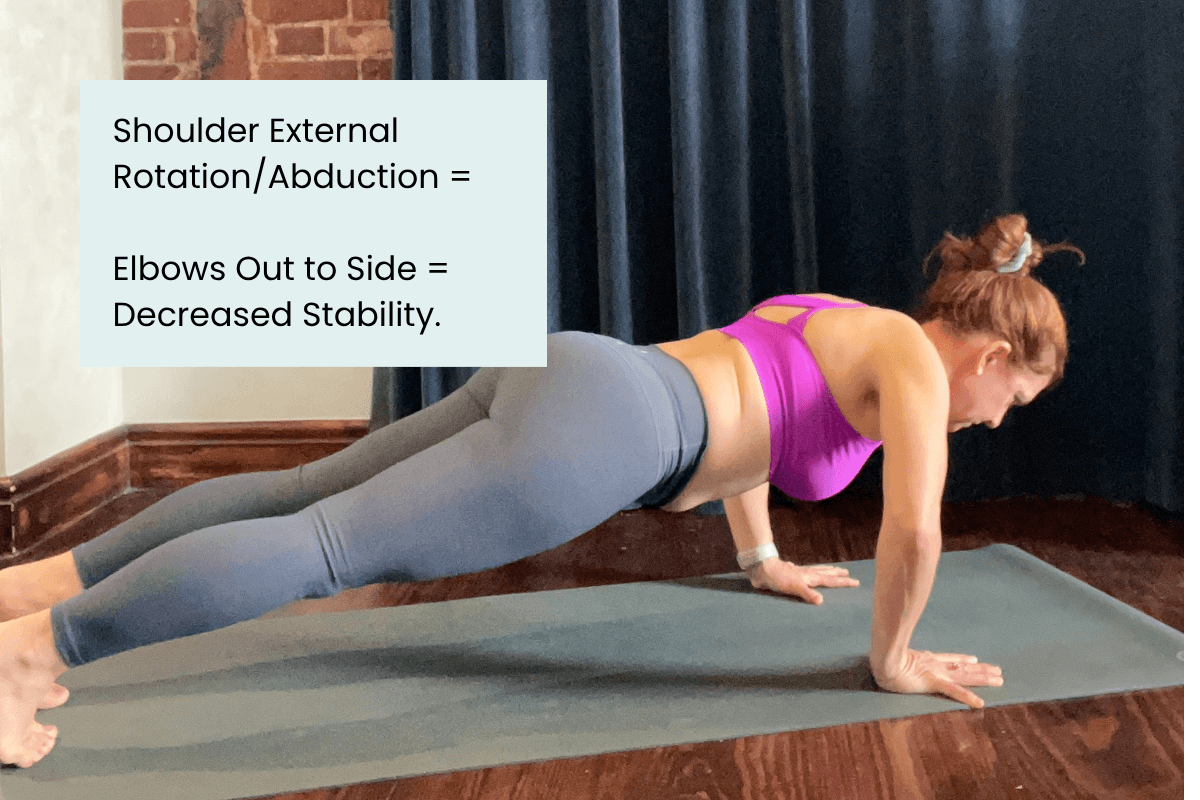
Elbows out away from the body = external rotation and/or abduction at the shoulder
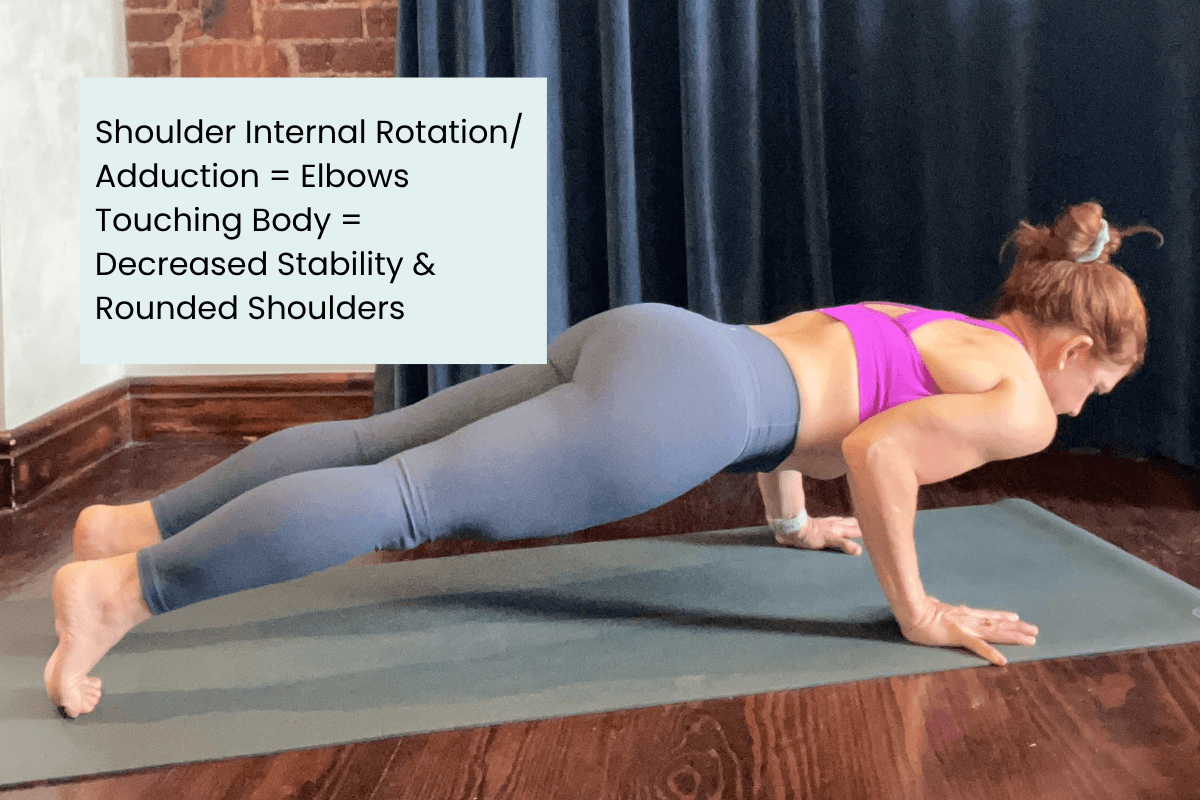
Elbows tucked close to the body = internal rotation and/or adduction at the shoulder
Elbows close to the sides without squeezing = a relatively neutral shoulder position, without rotation
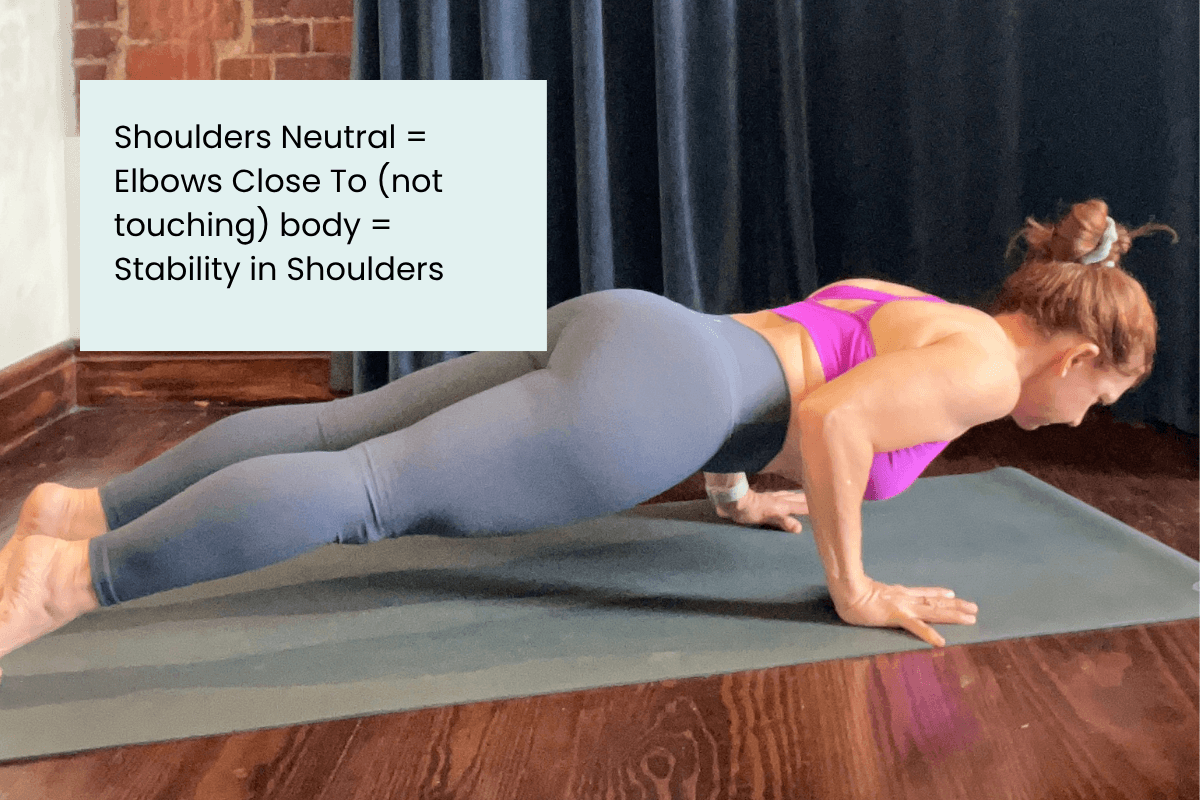
When the shoulders are in that neutral position, lowering into chaturanga involves primarily shoulder extension. No rotation, no abduction. The movement is simpler, and the shoulder muscles, including the rotator cuff, can engage most effectively.
When the elbows wing out, the shoulders tend toward external rotation. This isn't inherently dangerous, and many practitioners move this way without any issues. The challenge is that it can make it harder to maintain shoulder stability, particularly for students who are still building strength.
When This Cue Works and When to Skip It
This is where it gets practical.
The cue "elbows by your sides" can genuinely be useful. If you look across the room and see a student's elbows wide and their shoulders rotating or rounding forward, cueing them toward a more neutral shoulder position makes sense. That's exactly why understanding your anatomy matters. When you know what the cue is actually doing, you know when it applies.
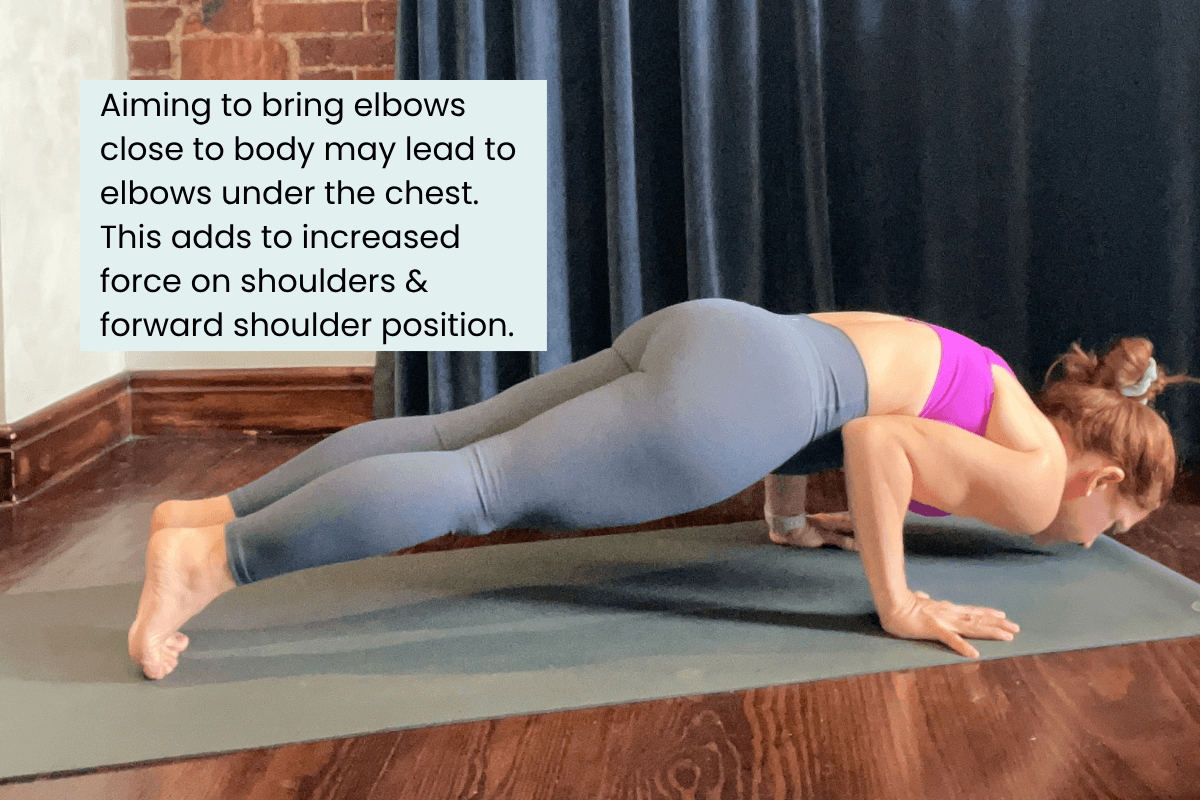
The problem is when it gets applied as a blanket instruction, said the same way to every student in every class regardless of what's happening in the room. Because some students will take it too far. Elbows tucked all the way under the ribcage, weight shifting forward onto the arms, shoulders rounding. The intention was shoulder stability. The result is the opposite.
Look first. Cue to what you see.
The Bottom Line
The cue "elbows by your sides" in chaturanga is a shoulder alignment cue in disguise. Elbows close to the sides happen naturally when the shoulders are in a relatively neutral position. That neutral position tends to create more stability, better muscle engagement, and a more efficient posture overall.
Use the cue when you see elbows winging out and you want to guide the shoulders toward neutral. Skip it when the elbows are already where you want them. And if a student has tucked so far that their elbows are under their body, that's your signal to look more closely at what's happening at the shoulder and respond to what you actually see.
A More Empowering Approach
The most empowering thing you can do as a yoga teacher is look at your students before you cue. The cue "elbows by your sides" isn't the problem. Saying it without looking is. When you understand the anatomy behind a cue, you can decide in real time whether it applies to the person in front of you. That's the difference between hoping students understand you and making a real impact for their practice.
Get Curious! Q&A
Is it bad to have your elbows out in chaturanga?
Not necessarily. Elbows out typically means the shoulders are moving into external rotation, which can make it harder to maintain stability, particularly for students still building strength. For stronger, more experienced practitioners, some elbow flare may not cause any issues at all. Look at what's happening at the shoulder and respond to what you see.
Why do some students tuck their elbows too far in?
Usually because they're following a cue literally without understanding the intention behind it. When "elbows by your sides" gets interpreted as "squeeze your elbows into your body," the elbow can end up under the ribcage, weight shifts forward onto the arms, and the shoulders tend to round. The intention was stability. The result can work against it.
Should I stop using the "elbows by your sides" cue altogether?
No. It's a useful cue when the elbows are genuinely wide and you want to guide the shoulders toward a more neutral position. Look first. Cue to what you actually see, not to what you assume is happening.
What's the most important thing to focus on in chaturanga alignment?
The shoulder joint. Elbow position is downstream of shoulder position. When the shoulders are stable and relatively neutral, the elbows tend to follow naturally. Build your cueing around what the shoulder is actually doing and you'll have a much clearer picture of what's happening in the posture.
Go Deeper with your understanding of yoga anatomy and cueing.
Chaturanga is one posture. The principles behind it, understanding how joints work, reading what you see in the room, knowing when a cue applies and when it doesn't, those principles carry across every posture you teach. The Enlightened Anatomy Course is where we build that foundation.
Explore the Enlightened Anatomy Course →
About the Author
Dr. Trish Corley is a Doctor of Physical Therapy (Physiotherapy) and yoga teacher trainer with over two decades of clinical experience. She helps yoga teachers learn anatomy, give clear cues, and create classes their students love. Based in Lisbon, Portugal, she leads the Enlightened Anatomy Course, the Elevate Your Impact Mentorship, and the Power to Lead 200-Hour YTT.